You can create an individual product using the Create Product page. The Product Setup wizard guides you through each step of the process.
Tip: To change existing products, see Custom attribute families.
The type of product to create determines the available settings and their defaults. See Product Setup for more information. To learn how to change your company's product setup, contact your Store Operations team.
Create an individual product
Prerequisites
-
Gather the following information before you create the product:
-
Text (TXT) file containing the list of serial numbers or unlock code. The file must contain one code per line (with a hard return between codes).
- Application file (if the product is downloadable)
- Product images (thumbnail and full image pictures)
- Product descriptions (short and long)
- Export Control Classification Number (ECCN) and Country of Origin
-
Step 1: Create an individual product
-
Go to the Product Setup wizard and choose a template and choose one of the following options:
- Select Catalog, select Products, and then click Create Product.
- Select Catalog, select Products, click Manage Product and then click Create Product.
-
Choose Individual Product as the template. See Product Setup for more information.
Note: If you want to create a product combination with multiple variations, see Creating a product combination for instructions.
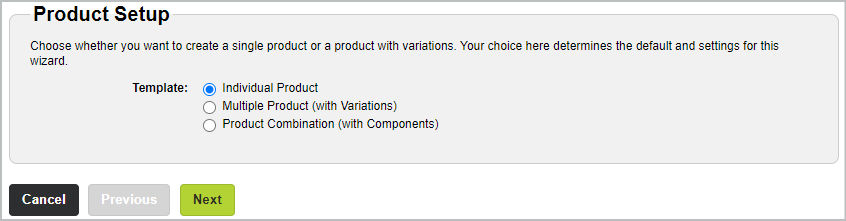
- Click Next.
-
Select the supported locales. See Supported Locales for more information.
-
Select the checkbox next to each locale you plan to support.

-
Select the Default option next to a locale that you want to use as the default.
The system will use the default locale to display in your store if the shopper’s locale is unknown.
-
If required, select the Restrict Product Visibility and Purchasing to Locales Below checkbox. This checkbox allows you to sell this product only to the selected locales.
- Click Next.
-
-
Add the product to catalogs and categories.
-
Under Add Product to Catalogs, select the checkbox next to each catalog where you want the product to appear.
-
Under Add Product to Categories, select the checkbox next to each category where you want your product to appear.
Note: You must select a catalog before you can select a category.

- Click Next. See Catalogs and Categories for more information.
-
-
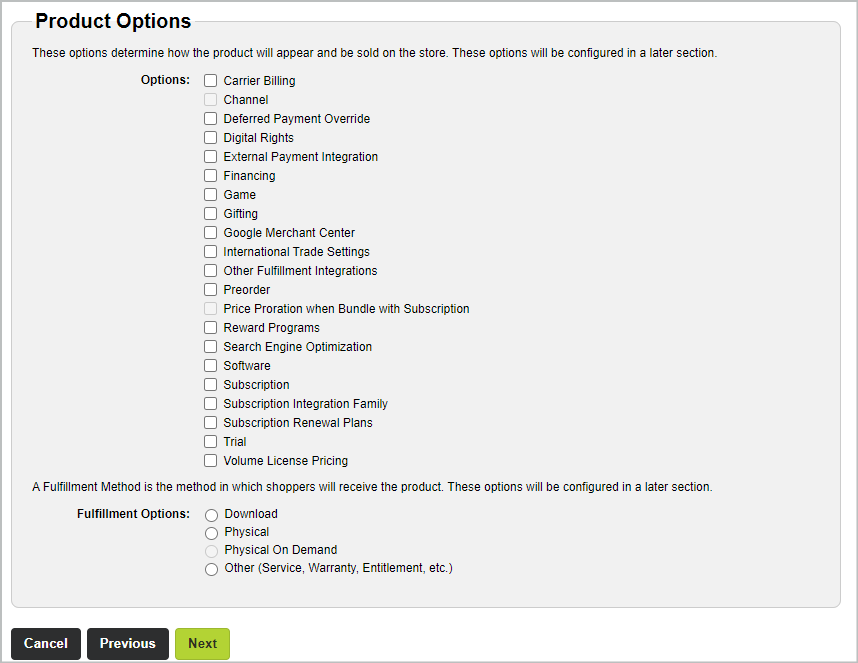
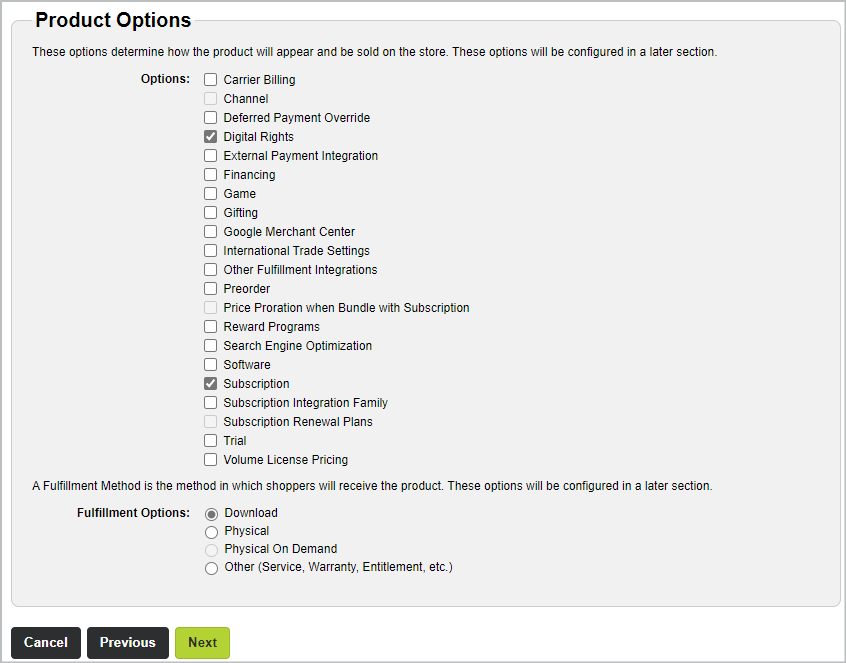
Select the product options. See Product Options for more information.
-
If your company created Custom attribute families, select the checkbox next to each option you want to apply to the product. If you are creating a subscription product, select the Subscription option.
For additional information on creating subscription products, see How to create a Flex Term renewal for a subscription product
-
Select the fulfillment option for your product.
- Click Next.
-
-
Configure the product settings. See Product Settings for more information.
- To change the product settings for the default locale, click the default locale tab and complete the fields. If you click a different locale tab, click Yes when prompted to save your changes.
- To change settings for a non-default locale, click the non-default locale tab and complete the fields. To make that tab the default locale, select the Override default locale settings checkbox, and complete the fields. If you click a different locale tab, click Yes when prompted to save your changes.
-
Repeat step b for each additional locale.

- Click Next.
-
Assign a price to the product. See Pricing for more information.
-
Type the price of the product in the Price field. (Optional.) Select the Allow Zero checkbox if the product is part of a promotion or giveaway. Repeat this step for each additional currency.
-
Click Finish. The Edit Product page appears.
Important: You acknowledge the Export Compliance Acknowledgment Statement by clicking "Finish" and adding a product through this interface. This statement appears at the bottom of the Pricing step.
Note: If the Edit Product page shows any errors, you can correct the errors on the Edit Product page and save the changes.
If you create a product with variations, you must select the fulfiller location, provide a Part Number, and update the tax rules for each product variation on the Details tab of the Edit Product page. You can also update any attributes that are unique to that product variation.
-
- Deploy the product. See Deploy Products for instructions.
How to create a Flex Term renewal for a subscription product
To create a subscription that uses Flex Term renewal:
- Follow the instructions in Step 1: Create an individual product.
-
When you reach the Product Options step, select the Subscription checkbox.
-
When you reach the Product Settings step, configure the product setting and complete the fields under Subscription. See Subscription for more information.

- Choose Flexible Term from the Payment Schedule drop-down list.
- Select the number of billing cycles from the Number of Billing Cycles drop-down list.
- Under Notifications, clear the checkboxes associated with Reminders for Automatic Renewals.
- Choose one or more manual renewal reminders checkboxes associated with Reminder for Manual Renewals.
- Select one or more checkboxes associated with Update Expired Credit Card to send credit card expiration reminders before billing events.
- Click Next and complete the rest of the field in the Product Setup wizard.