Use the Configure Site Settings page to configure your site's settings. These site settings control which features appear in your store and how your store behaves or operates. The settings available to you depend on your user roles and the template your store uses.
The following list explains why some settings may not appear on this page:
- You are not a Digital River Internal User
 An internal Digital River user of Global Commerce. Internal users have access to features or settings that clients do not. These features
or settings could really affect commerce on the store or is complicated
to set up or manage.. A Digital River Internal User can see these settings because changing those settings could greatly affect your store.
An internal Digital River user of Global Commerce. Internal users have access to features or settings that clients do not. These features
or settings could really affect commerce on the store or is complicated
to set up or manage.. A Digital River Internal User can see these settings because changing those settings could greatly affect your store. - You do not have the user roles required to view the settings.
- Your store uses a template that does not support a setting. The template your store uses appears in parenthesis at the top of the Configure Site Settings page.
If you need assistance changing a setting, contact your Store Operations team.
Changes you apply to the site settings take effect immediately.
General tab
| Attribute | Description |
|---|---|
|
General |
|
|
Use the Site Information settings to enter your site and company name, as you want it to appear to shoppers in your store. See Site settings and Site Information for more information. |
|
|
Site Name |
Enter the name of your store, as you want it to appear to shoppers. |
|
Company Display Name |
Enter the name of your company, as you want it to appear to shoppers. |
|
Site Status |
Shows the status of the site. |
|
Design Pro (Forge) |
Choose one of the following options:
|
|
Use the Domain Services settings to set up the virtual domain settings for your store. You must specify that you want to use a virtual domain in your contract. Before you try to use a virtual domain, contact Digital River. See Site settings and Domain Services for more information. |
|
|
Allows you to customize your Store Builder promotional links. Choose one of the following options:
|
|
|
Default |
Select the domain you want to use as your default domain. |
|
Domain |
Shows the available domains for your site. |
|
Add |
Add a virtual domain. Note: Adding or deleting virtual domains require contractual updates. |
|
Virtual Domain |
Enter the domain name for the virtual domain. Storefront Links uses this domain when generating hyperlinks for your site. This field appears when you click Add. |
|
Restrict Current Domain to Allowed Sites Only |
Select this checkbox if you want to restrict the domain specified in the Virtual Domain field to only show sites associated with the domain and company. This prevents shoppers from changing the site ID in the URL to show another site if that site is not associated with the virtual domain. This field appears when you click Add. |
|
Redirect Actions |
If you selected the Restrict Current Domain to Allowed Sites Only checkbox, you must choose an option that defines how you want to restrict access. Your options are as follows:
This field appears when you click Add. |
| Use Specific URL for Redirects |
Enter the URL where you want shoppers redirected to if they try to view a site from your virtual domain that is not associated with your site and/or company. This field appears when you select the Use Specific URL for Redirects option. |
| Delete | Delete one or more selected virtual domains. |
|
The Help Pages settings determine the type of help information available to a shopper on your site. See Site settings and Help Pages for more information. Note: Any changes made to this section may take up to 2 hours to appear on your site. |
|
|
Backup Media FAQs |
Select this checkbox if you want a shopper to view the Frequently Asked Questions (FAQs) that relate to backup CDs. |
|
Extended Download Services (EDS) FAQs |
Select this check box if you want a shopper to view the FAQs that relate to the Extended Download Service (EDS). |
|
Display |
Choose one of the following options:
|
Checkout tab
| Attribute | Description |
|---|---|
|
The Address Restrictions settings allow you to configure restrictions, based on the client's specifications, that prevents a shopper from entering a shipping address or billing address that violates the site's delivery restrictions. Example: You can define a restriction that prevents the shopper from including their PO Box in the Street Address (Line 1). Note: Address restrictions only to apply to implementations that include physical products. |
|
|
Deny Based on Street Address (Line 1) |
Allows you to choose to deny billing or shipping based on a shopper's billing or shipping address. Choose one or more of the following options:
|
|
Denied Words in Billing Addresses |
Enter up to 50 lines of words, phrases, symbols or addresses that will result in a denial of the billing address, one on each line. The system denies billing to any shopper’s street address (line 1) that contains one or more of these terms. |
|
Denied Words in Shipping Addresses |
Enter up to 50 lines of words, phrases, symbols or addresses that will result in a denial of shipping address, one on each line. The system denies shipping to any shopper’s street address (line 1) that contains one or more of these terms. |
|
Deny Based on City |
Allows you to choose to deny billing or shipping based on a shopper's billing or shipping city. Choose one or more of the following options:
|
|
Denied Billing Cities |
Enter up to 50 lines of words, phrases, symbols or names that will result in a denial of billing address, one on each line. The system denies billing to any shopper’s city that contains one or more of these terms. |
|
Denied Shipping Cities |
Enter up to 50 lines of words, phrases, symbols or names that will result in a denial of the shipping address, one on each line. The system denies shipping to any shopper’s city that contains one or more of these terms. |
|
Deny Based on Postal Code |
Allows you to deny billing or shipping based on a shopper's billing or shipping postal code. Choose one or more of the following options:
|
|
Denied Billing Postal Codes |
Enter up to 50 postal codes that will result in a denial of billing address, one on each line. The system denies billing to any shopper’s postal codes that contain any of these codes. |
|
Denied Shipping Postal Codes |
Enter up to 50 postal codes that will result in a denial of the shipping address, one on each line. The system denies shipping to any shopper’s postal codes that contain any of these codes. |
|
Use the Address Validation settings to indicate what validation service you want to use to verify addresses when shoppers place an order in your store. When a shopper enters an address (and you enabled address validation), the site validates the address and the format. This helps reduce the number of undelivered shipments due to bad addresses or rejected payments due to an unverified billing address. See Site settings and Address Validation for more information. |
|
|
Type |
Choose the service you want to use. Your options are as follows:
|
|
Validate |
Choose one or more of the following options:
|
|
Use the Authentication settings to require shoppers to sign in to your store and authenticate themselves before they can browse your products or make a purchase. See Site settings and Authentication for more information. |
|
|
Authentication |
Select whether or not you want to enable the authentication feature for your store.
|
|
Default Action |
Choose the page that the system will redirect to when they try to enter your site without authenticating themselves. The action usually corresponds to a specific page, such as a Login page or Contact Us page. Select Enabled for Authentication to enable this list. |
|
Exclusions |
Select the actions you want to exclude from authentication. Shoppers can perform the selected actions regardless of whether or not they sign in to your store. |
|
Checkout |
Use the Checkout settings to choose what elements you want to appear in the shopping cart and whether you want to force shoppers to create an account with your site before they can complete their purchase. Conversely, you can also allow shoppers to shop anonymously. See Site settings and Checkout for more information. |
|
Checkout Type |
Choose one of the following options:
|
|
Display |
Select how you want to create accounts on your site. You can choose one or more of the following options:
|
|
Terms of Sale Acceptance |
Select how you want terms of sales acceptance to work in your store. Your options are as follows:
|
|
CVV Code |
Select whether you want to require a CVV code for credit card orders. Your options are as follows:
|
|
Use the Flow settings to control the pages you want to use when a shopper checks out. There are several types of checkout flows available, and each one has different pages specific to that flow. See Site settings and Flow for more information. |
|
|
Checkout Flow |
Lists the available checkout flows in your store. |
|
Default Checkout Flow |
Determines which checkout flow your store uses by default. |
|
Enable for Site |
Determines which checkout flows your store can use. |
|
Use the Request Estimate settings to provide a quote feature for the price guarantee. See Site settings and Request Estimate for more information. |
|
|
Request Estimate |
When you enable this feature on your site, it adds a Request Estimate button to the shopping cart. Shoppers can click the button to request so that shoppers can get an estimate of the contents in their cart. Estimates do not guarantee the pricing of the items in the shopping cart, they only save the contents of the cart so the shopper can return to your store and place an order.
To learn more about estimates, see Site settings and Request Estimate. |
|
Order Limit |
You can choose to limit the number of orders a shopper can place for the same estimate. Choose one of the following options:
|
|
Set Estimate Expiration |
Choose how long the estimate will be valid after the system creates it. How long an estimate stays valid determines how long a shopper can access that estimate and place an order from that estimate. Your options are as follows:
|
|
Send Reminder Email |
Select whether you want to send a reminder email to a shopper who requested an estimate if they did not place an order from that estimate. Your options are as follows:
|
|
Display "Contact me..."Checkbox |
Select whether you want a checkbox to appear when shoppers request an estimate that allows shoppers to ask customer service or sales to contact the shopper (via phone or email) regarding their estimate. Your options are as follows:
|
|
Company Representative |
Enter the email address of the person (or persons, if you enter a distribution list) that will provide assistance with the estimate and answers questions regarding the estimate. The email address you enter should be the person (or persons) who can work with the shopper to complete their purchase. This is not the person who contacts the shopper if the shopper selects the Contact Me checkbox. |
|
If a shopper does not complete the order and visits your store again, the system restores the contents of their shopping cart based on your settings here. Shopping cart contents can contain products and offers. See Site settings and Restore Cart Contents for more information. |
|
|
Products |
Use the toggle to enable or disable the restoration of products in the shopping cart.
|
|
User-Triggered Offers |
Use the toggle to enable or disable the restoration of promo URL and coupon code triggers in the shopping cart.
|
|
Offer Settings Reconciliation |
Allows you to reconcile restored items with the system based on latest offer settings.
|
|
Specify how many days after creation you want to retain the contents of a shopping cart. This field appears when you select ON for Products. |
|
|
The Shopper Restrictions setting determines whether minimum and maximum purchase restrictions are set by line item or across the line items in the shopping cart. See Site settings and Shopper Restrictions for more information. |
|
|
Restriction Level |
Choose how you want to enforce purchase restrictions. Your options are as follows.
|
|
Choose whether you want to enable product restrictions.
|
|
|
When you enable Cart Item Limit, Global Commerce will validate against the Maximum items per cart each time the shopper adds a new item, ensuring an optimal order size and improving the processing performance. If adding a new item exceeds the configured limit, Global Commerce will not add the item to the cart, and Commerce API will throw a 403 Forbidden error code. The Maximum items per cart setting is off by default. Note: The Cart Item Limit attribute only works for a Commerce API environment, not in a Global Commerce-hosted environment. To limit the number of items in the cart, select the Cart Item Limit checkbox and enter a number in the Maximum Items per cart field.
|
Event Notifications tab
Use the Event Notifications tab to configure post-order notifications (PON). See How to configure Event Notifications settings for instructions.
| Attribute | Description | ||
|---|---|---|---|
|
Auto Created Line Item Level Return Product |
The Auto Created Line Item Level Return Product event occurs when a product shipped to a customer cannot be delivered to the specified shipping address. Consequently, the product is automatically returned to the fulfiller. This event typically results from a failed CancelRequest, indicating that the cancellation process was initiated but ultimately did not succeed before the item was shipped out. In such scenarios, the system automatically generates a return for the specific line item, facilitating smoother return processing and improved operational efficiency. |
||
|
Cancel Request Return Product |
The Cancel Request Return Product event occurs when a customer returns a product they initially intended to cancel but received. This situation arises due to a failed CancelRequest, where the customer initiated the cancellation process but was not successfully executed before the product was dispatched. In such instances, the customer returns the product upon its delivery. This type of return is critical to understand as it reflects areas where the cancellation process can be improved to prevent unnecessary shipping and returns, thereby enhancing customer satisfaction and operational efficiency. |
||
|
Line Item Level Return Product |
The Line Item Level Return Product event occurs when a customer initiates a return at the individual product line item level due to service-related issues. Examples of such issues include receiving an incorrect product. This event is categorized under ReturnType specifically for line item returns. Purpose: The event aims to address and rectify incidences where the product delivered does not match the customer's order, enhancing customer satisfaction by facilitating a smooth return process. Key points:
|
||
|
Replacement Product Return |
The Replacement Product Return event is triggered when a customer receives a damaged product and initiates a return. Unlike typical returns, the focus here is replacing the damaged item rather than providing a monetary refund. This event falls under a specific ReturnType designated for situations where the aim is to exchange the damaged product with an undamaged equivalent, ensuring that the customer receives what they initially purchased without any financial reimbursement being involved. Key characteristics:
|
||
|
Replacement Return |
Replacement Return is initiated when a customer receives a damaged product and decides to return it. In these cases, the customer is not seeking a monetary refund but a direct replacement of the damaged item. This return type falls within a specific category focusing on exchanging the damaged product for a new, undamaged version, thus ensuring that the customer's initial purchase intention is fulfilled without any financial transactions for the return.
|
||
|
The Refunds tab provides a comprehensive list of the different refund events in an eCommerce platform. This section details each event, ranging from customer-initiated cancellations to refunds due to overpayments or price adjustments. Understanding these scenarios is essential for managing financial transactions efficiently and ensuring customer satisfaction. This guide will walk you through each type of refund, their triggers, and how they are processed, enabling you to handle refunds confidently and effectively. |
|||
|
A Cancellation Refund event occurs when an order is cancelled before fulfillment and has a settled payment. This type of refund is generated by the system for orders that have been cancelled, including both delayed settled orders and auto settle settled orders. This refund event is particularly used for line item returns set up due to a failed CancelRequest. |
|||
|
CPG Initiated Satisfaction Refund |
A CPG Initiated Satisfaction Refund is issued by Customer Service through the central payment gateway (CPG). This type of refund is used when other means of refund are not feasible, requiring intervention from Customer Service. The Commerce Operation Manager, unable to issue a refund through standard procedures, contacts Customer Service which then executes the refund using the CPG refund screen. This refund represents the ReturnType for satisfaction refunds initiated via CPG, showcasing a direct approach to handling special refund circumstances. |
||
|
Line Item Level Issuer Refund |
The bank or card issuer initiates the Line Item Level Issuer Refund o address specific line items within an order. This type of refund is generated outside the standard Global Commerce platform processes and reconciled through the central payment gateway (CPG). It signifies a direct intervention by the financial institution, typically when there's a dispute, error, or need to adjust a particular line item of an order. This refund category underscores the importance of external financial entities in the refund process, ensuring accuracy and customer satisfaction at the line item level. |
||
|
Line Item Level Satisfaction Refund |
A Line Item Level Satisfaction Refund is initiated by Customer Service to resolve issues at the granularity of an individual line item within an order. This type of refund is typically issued when a customer has received a damaged or incorrect product. The objective is to ensure customer satisfaction by addressing and rectifying specific issues related to particular items in an order without affecting the entirety of the transaction. |
||
|
Order Level Issuer Refund |
An Order Level Issuer Refund is a refund initiated by the bank or card issuer through the central payment gateway (CPG). This type of refund addresses the entire order and is typically triggered outside the Global Commerce platform. It represents the ReturnType for returns reconciled when an Issuer Refund from CPG occurs. It highlights direct financial institution intervention in the refund process for the whole order, ensuring accuracy and maintaining customer satisfaction. |
||
|
Order Level Satisfaction Refund |
Customer Service initiates an Order Level Satisfaction Refund to fulfill a customer’s satisfaction in instances such as receiving a damaged product. This type of refund addresses issues on an order-wide basis rather than targeting individual items within the order. It represents a specific ReturnType for returns processed when reconciling an Order Level Issuer Refund from the central payment gateway (CPG) initiated outside the Global Commerce platform. This approach ensures customer satisfaction by accurately addressing and rectifying concerns affecting an order. |
||
|
Order Level Suppress Refund |
The Order Level Suppress Refund is a system-generated refund event for an order after a fraud suppression has been identified and Digital River has collected the funds. This type of refund occurs when fraud suppression is activated after the funds are settled or cleared, prompting the system to initiate a refund immediately. This ensures that any potentially fraudulent transactions are quickly addressed and rectified, maintaining the integrity of the financial transactions on the platform. |
||
|
Overpayment Difference Refund |
An Overpayment Difference Refund is a manual refund will be issued if a customer reports an overpayment to Digital River Customer Service, which can occur with payment methods such as Wire Transfer. Unlike other refund events, the system does not automatically generate a refund based on the overpayment event itself. It represents the ReturnType for a return created specifically to refund the overpaid amount, ensuring that customers are only charged the correct amount for their purchases. |
||
|
Price Adjustment Refund |
Customer Service issues a Price Adjustment Refund to match the price of a product when another retailer offers the same product at a lower price. This can happen in cases such as customers requesting a price match for a recently purchased item or if a customer has pre-ordered a product and its price drops before its release. This refund ensures customers receive the best possible deal, aligning the purchase price with current market rates. |
||
|
Refund Credit Complete |
The customer received credit for the refund. The Refund Credit Complete event signifies the completion of the refund process, where the refunded amount has been successfully credited back to the customer's account. This step is crucial in ensuring customer satisfaction by confirming that the refund has been processed and the funds are available to the customer. |
||
|
Replacement Refund |
A Replacement Refund is issued when a customer requests a replacement for a product, but the product is out of stock, making the replacement impossible. In such cases, a refund is made available to the customer rather than providing a replacement. Importantly, this type of refund does not necessitate the return of the product to initiate the refund process. This refund category falls under the ReturnType for returns resulting from an unfulfilled replacement request due to inventory constraints, signifying that a refund mechanism is activated as a resolution. |
||
|
Return Receipt Created |
The Return Receipt Created marks the event when a returned physical product is received and acknowledged by the fulfillment department, leading to the initiation of the refund process for the product. This event is critical in tracking and managing the return and refund cycle, ensuring that customers are refunded promptly upon the successful return of merchandise. |
||
|
Review Refund |
A Review Refund event occurs when Customer Service issues a refund through a central payment gateway (CPG). This type of refund is typically enacted when a Commerce Operation Manager cannot process the refund through standard means and thus contacts Customer Service for resolution. The refund is executed using the CPG refund screen, ensuring the customer receives it efficiently and securely. |
||
|
Tax Exempt Refund |
A Tax Exempt Refund event occurs when Customer Service issues a tax refund to a client who has proven their tax-exempt status. This process usually involves the client providing documentation of their tax exemption, such as an email confirmation, after which Customer Service processes and issues the refund accordingly. |
||
|
Line Item Level tab |
The Line Item Level tab lists events that provide detailed insight into individual product or service transactions within an order. This section is designed to help users and customer service representatives track each line item's status, from backorder to completion. Understanding these statuses is essential for managing inventory, fulfilling orders accurately, and providing timely customer updates. Here, you'll find various states a line item can take, such as back-ordered, cancelled, or pending fulfillment. This granular view ensures precise order management and enhances the overall efficiency of eCommerce operations. |
||
|
|||
|
Delayed Payment Cancel |
Customer Service cancelled a delayed payment. |
||
|
Payment Credit |
Customer Service sent a payment credit. |
||
|
Order Level tab |
The Order Level tab lists events that serve as a comprehensive platform for tracking the overall status of an order within our system. The events provide essential information on order progression from when it is placed until its completion. This tab is crucial for overseeing the lifecycle of an order, including any disputes, cancellations, or risk assessments that may arise. These event notifications help manage customer expectations, handle inquiries, and maintain the ordering process's integrity. |
||
|
Ordered Cancelled |
The Order Cancelled event occurs when an existing order is canceled either by the fulfiller or by a customer service representative. The cancellation stops all processing and fulfillment activities for the order, effectively ending its lifecycle within the system and ensuring the fulfiller will not complete the orders for various reasons, such as customer retraction or fraud detection, to maintain the integrity of the transaction process. Example: The customer decides they no longer want the product and contacts customer service, who cancels the order. |
||
|
Order Complete |
The Order Complete event signifies that an order has reached its conclusion successfully. This state is achieved once the order has been placed and all aspects of its fulfillment process have been executed without issues. The ordered product or service has been delivered to the customer per the agreed terms. Example: An order for a laptop is placed on the website, and after processing and shipment, the laptop is delivered to the customer, marking the order as complete. |
||
|
Order In Process |
The Order in Review event indicates that we are currently working on the order. This state occurs after an order has been placed but before all elements of its fulfillment have been completed. The order is in a transitional phase toward completion. Example: Example: After placing an order for a set of headphones, the order's status is updated to "In Process" as it undergoes preparation for shipment. |
||
|
Order In Review |
The Order in Review event represents a critical evaluation step in the order processing cycle, specifically targeting fraud prevention. During this phase, an order undergoes a thorough review by the Digital River Fraud Review team to identify potential fraudulent activities. Various types of reviews may take place, including:
The outcome of this review can significantly impact the order's progression toward fulfillment, prioritizing the safety and security of transactions. |
||
|
Order Placed |
The Order Placed event occurs immediately after a shopper has successfully completed the ordering process. During this stage, the shopper's order is confirmed and readied for subsequent processing, including transferring the order details to the operational data store for further processing. At this point, the order journey through fraud prevention review, risk assessment, and fulfillment preparations begins. This stage is critical for ensuring that all order details are accurate and ready for the next steps in the order processing cycle. |
||
|
Order Risk |
The Order Risk event occurs when an order shows potential signs of fraudulent activity. This step in the order processing cycle involves a comprehensive review and risk assessment to identify and address any suspicious elements that may indicate fraud. The review process aims to prevent fraudulent transactions and minimize financial losses for the business. Depending on the findings, we may temporarily hold, further investigate, or, in some cases, cancel an order to safeguard the business and its customers. |
||
|
Order Shipped |
The Order Shipped event signifies that the fulfiller shipped the order to the customer. This critical stage in the order processing cycle indicates that the packaging and shipping preparations are complete and the order is on its way to the delivery address specified by the shopper. The event confirms the transition of the order status to 'shipped,' signaling that the products have left the warehouse or fulfillment center and are in transit to the customer. This event is crucial for the business and the customer, as it indicates the order's progress and expected delivery timeline. |
||
|
Order Submitted |
The Order Submitted event occurs immediately after the customer successfully places an order and marks the completion of the order placement process, indicating the transference of the order details from the order taker to the operational data store. At this stage, further processing activities, such as shopper notifications, are initiated to inform the customer about the order's progress. This event is crucial as it signals the start of the order fulfillment process, setting into motion the series of steps required to prepare and dispatch the customer's order. |
||
|
Other tab |
The Other tab lists events that encapsulate transactional events that do not fit neatly into the conventional payment or order processing categories. It includes special cases and exceptional conditions that may arise during the lifecycle of an order. Understanding these events is crucial for effectively navigating and managing the complexities of eCommerce operations. This section provides insights into handling these unique cases, ensuring customer satisfaction and operational efficiency are maintained. |
||
|
A bank initiates the Order Dispute Chargeback event when a customer disputes a charge on their order, leading to a chargeback for various reasons, such as unauthorized transactions or disputes over the received goods or services. The event marks the start of an evaluation process of the disputed transaction to determine whether to reverse the charge. This critical event impacts financial reporting and customer relations, necessitating prompt and appropriate action to resolve the dispute and, if possible, retain customer goodwill. |
|||
|
Order Level Suppress |
The Order Level Suppress event occurs when the Digital River Fraud Operations team cancels orders for reasons such as suspected fraud or other business-related concerns. When suppression happens, especially on delayed or settled orders, a "Suppression Refund" return type is generated to ensure the appropriate handling of financial implications, safeguarding the business's and customers' interests. |
||
Features tab
| Attribute | Description |
|---|---|
|
Provides shoppers the option to purchase a physical version of a download product while in the shopping cart. |
|
|
Backup Media |
Choose one of the following options:
|
|
Target Segments |
Target segments allow you to choose which products should use the configurations you create for your Backup Media.
|
|
Displays the "Bought - Also Bought" section on the store. This feature requires additional Site Design work for the list to appear in your store. See Site settings and Bought - Also Bought for more information. |
|
|
Bought - Also Bought |
Note: This feature is currently unavailable. Choose one of the following options:
|
|
Maximum Products |
Choose the maximum number of products to display on your store. This field appears when you enable the feature. |
|
E-Invoice for Taiwan |
This setting allows the site to issue e-invoices and upload related data to the government's e-invoice platform. The e-invoice is also known as the electronic Government Uniform Invoice (eGUI). |
|
E-Invoice for Taiwan |
Choose one of the following options:
|
|
Global Tax ID Management |
Global Tax ID Management allows the site to collect and validate the shopper's tax IDs for all countries where Digital River has business ties. |
|
Global Tax ID Management |
Choose one of the following options:
|
|
Shopper Type |
You can define which shopper types should be displayed on the Billing page for the shopper to select. Your options are as follows:'
|
|
Use the Home Page Search Engine Optimization settings to control how your store appears in a search engine's search results and the keywords associated with your store for search. The settings you enter here pertain to your store's home page. You can also use search engine optimization with custom pages, categories, and products. See Site settings and Home Page Search Engine Optimization for more information. Note: This setting will not work in your store if you disinherited the header in your template. |
|
|
Title Tag |
The text for the link that appears when the product appears in the search results. The title appears as the primary link in the search results. The maximum recommended length is 70 characters. |
|
Meta Description |
Enter the description that the shopper sees under the text link in the search results. Use this text to describe or promote your store or brand, identify the products you sell, or the reason why a shopper might visit your site. The recommended length is 150 characters. |
|
Meta Keywords |
The words you expect a shopper to enter in a search engine. These words describe your products or store. Note: Do not use punctuation when entering words in this field. Enter keywords that describe the contents of the page and appear on the page. The recommended maximum number of words is 7. |
|
While this feature is enabled, the system will handle input shipping costs based on the tax-inclusive flag of the price list. When the toggle is OFF, the shipping and handling fee will always be tax exclusive. When the toggle is ON, it will refer to the configured price list as follows:
|
|
|
Master Toggle for eFinancing |
This setting allows the site to toggle between the existing (old) Term Codes implementation used by Global Commerce-hosted sites and the new Term Code Service implementation used by the Commerce API. This Master Toggle will be used by Term codes, Disclosure, Enable Multiple Terms, and Products. |
|
Master Toggle |
Choose one of the following options:
|
|
Enables the Compare Page features on the Storefront menu so you can create compare pages by category and locale. Compare pages my require additional Site Design work. See Site settings and Compare Pages for more information. |
|
|
Compare Pages |
Choose one of the following options:
|
|
Maximum Number of Products to Compare |
Choose the maximum number of products that a shopper can compare at one time. This field appears when you enable the feature. |
|
Controls various payment-related settings and options. |
|
|
Allows Payments Managers to customize the behavior of credit cards. |
|
|
Enable 3D Secure Shopper Authentication? |
Allows you to enable or disable 3D Secure authentication. 3D Secure authentication provides security for both retailers and customers who are shopping online. |
|
Suppress Zero Dollar Authorizations? |
Allows you to enable or disable the suppression of zero dollar authorization. When you disable the suppression of zero dollar authorization, you can verify a card by sending a zero dollar authorization request. Note that some issuing banks do not support the zero dollar authorization and reject the charge request even if the card details are accurate. |
|
Convert Auto Renewal To Manual On Zero Dollar Auth Failure? |
When enabled and a zero dollar authorization fails, the system automatically converts Auto Renewal to Manual Renewal. |
|
Save my CC site (default) |
When selected, the Save my CC site (default) checkbox automatically saves the shopper's credit card information for future transactions. This option is enabled by default for the shopper's convenience, ensuring a faster checkout process on subsequent visits. |
|
Enable Save CC Opt In and Opt Out |
This feature lets shoppers choose whether shoppers can save their credit card information for future transactions. When enabled, shoppers can choose one of the following options during the checkout process:
|
|
Allows Payments Managers to customize behaviors for delayed fulfillment payment methods. |
|
|
Delayed Payment Threshold Percentage |
Enter the percentage for the delayed payment threshold. |
|
Check Payment Clearance Period |
Enter the number of days allowed for the check to clear and for the bank to receive the funds. |
|
Delayed Payment Notification Days |
Enter the number of days allows for a delayed payment notification. |
|
Allows Payments Managers to specify who to inform when there are new applications for Client Credit Plus accounts. |
|
|
Recipient for pending LoC account notification (client MOR only) |
Allows the Payments Managers to designate who receives a notification when there are new applications for Client Credit Plus accounts. |
|
See Site settings and Preorders for more information. |
|
|
Preorder Authorization |
Choose one of the following options:
|
|
Use the Private Stores setting to indicate whether you want to use Private Stores on your site. Note that some Site Design work may be required to implement Private Stores on your site. See the following topics for more information: Note: If you want to create a Private Store, contact your Store Operations team. |
|
|
Private Stores |
The Private Stores setting allows you to create a Private Store for a specific site that provides custom pricing for different groups of shoppers with special access, such as resellers, VIP shoppers, employees, and so on. Choose one of the following options:
If you want to sell your products exclusively in Private Stores, you must enable the Private Store Exclusive Products feature. See Private Store Exclusive Products for more information. |
|
Product Combination |
|
|
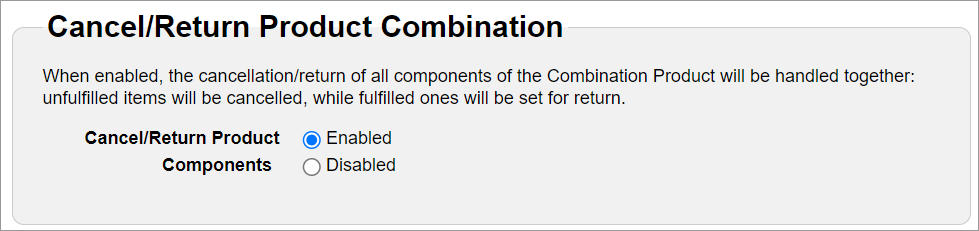
When enabled, Global Commerce handles the cancellation or return of all components of the product combination together: it will cancel unfulfilled items while setting fulfilled ones for return. Choose one of the following options:
|
|
|
When you select Component Price, the subscription renewal price will continue to use the product combination's configured component price. When you choose the List Price, the subscription renewal price will use the products' price in the price list. Choose one of the following options:
|
|
| Redirects | |
|
Redirects |
Use redirects when a product in your store reaches its end date, or you retire a product, and you want to redirect shoppers to an alternate page. You can also use temporary redirects for promotions or unavailable products. Choose one of the following options:
|
|
Use the Regulatory Fees to indicate whether you are required to charge and collect regulatory fees for purchases on your site. |
|
|
Regulatory Fees |
Allows you to create and use regulatory fees in the store. Additional work may be required to enable full-fee functionality in your store. See Site settings and Regulatory Fees for more information. Choose one of the following options:
|
|
Self-Service Email Notifications |
Allows you to self-manage your email notifications. With this setting enabled, the Email Notifications option will be visible in the menu and clients will be able to edit the content of any email notification enabled on this site. |
|
Use this setting when you want the system to lock themes, styles, compare pages, and custom pages when a user edits the item so that another user cannot change the item until the first user finishes editing the item. See Site settings and Store Builder Locking for more information. |
|
|
Locking |
Choose one of the following options:
Note: To disable the locking feature, you must first unlock all locked items in Store Builder and then disable the locking feature. |
|
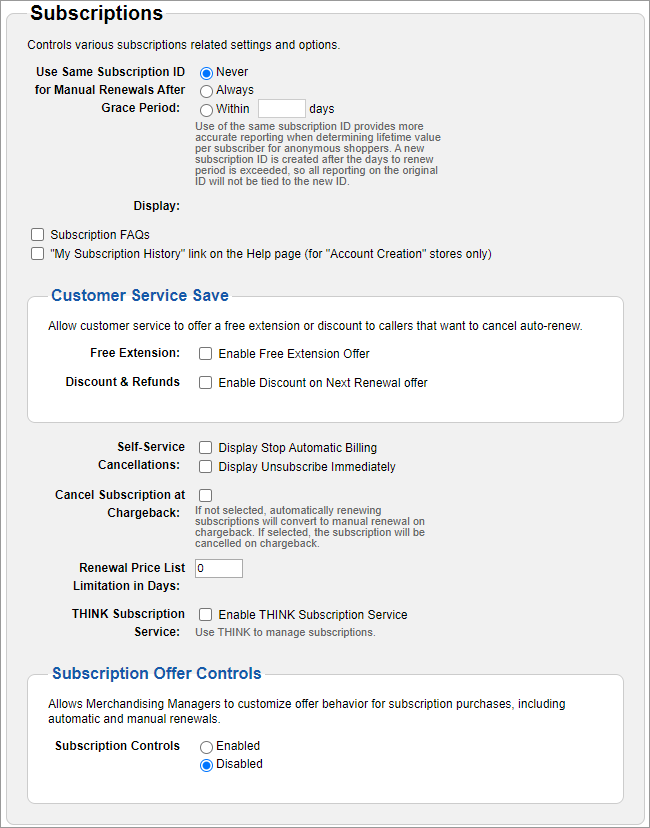
Use the Subscriptions feature to define how to handle subscription products and orders in your store. See Site settings and Subscriptions for more information. |
|
|
Use Same Subscription ID for Manual Renewals after Grace Period |
This option allows you to choose whether you want renewals to use the same subscription ID as the initial purchase or be issued a new ID (which is the default behavior) when a shopper manually renews their subscription. Best Practices: Select the Always option to get more accurate reporting and to help you determine the lifetime value per subscriber for anonymous shoppers. Choose one of the following options:
|
|
Subscription FAQs |
Select this checkbox if you want the subscription FAQs to appear in the Help pages for your site. |
|
"My Subscription History" link on the Help page (for "Account Creation") |
Select this checkbox if you want the Subscription History link to appear in the Help pages for your site. This link allows the shopper to manage their subscriptions through their account. Requirement: This option requires that you select Account Creation for the Checkout Type in the Checkout pod under the Checkout tab. |
|
Allow customer service to offer a free extension or discount to callers that want to cancel auto-renew. |
|
|
Select this checkbox and specify the duration of the free extension in days, weeks, months, or years. |
|
|
Discounts & Refunds |
Select the Enable Discount on Next Renewal offer if you want to offer a discount when a customer renews a subscription. Then select Enable Refund Offer checkbox and select option from the drop-down list to enable a refund offer for the current subscription and enter a percentage in the Discount % field. |
|
Display Stop Automatic Billing |
Select this checkbox if you want to allow shoppers to stop automatic billing for their subscriptions while viewing their subscription information in www.findmyorder.com.(Stopping the automatic billing turns the subscription into a manual renewal subscription.) If you do not select this option, a shopper must call Customer Service to stop the automatic billing for their subscription. Note: You are legally obligated to provide an "exceedingly simple" way for a shopper to stop an auto-renewal subscription. To provide an alternate method for shoppers to stop the automatic renewal of their subscription, select the Display Stop Automatic Billing checkbox, the Display Unsubscribe Immediately checkbox or both checkboxes to ensure one of these links appear on the self-service pages. |
|
Display Stop Automatic Billing |
Select this checkbox if you want to allow shoppers to stop automatic billing for their subscription from www.findmyorder.com. |
|
Display Unsubscribe Immediately |
Select this checkbox if you want to allow shoppers to stop their subscription from www.findmyorder.com.When a shopper stops their subscription, they immediately lose access to their subscription. |
|
Cancel Subscription at Chargeback |
If you clear the checkbox, automatically renewing subscriptions will convert to manual renewal on chargeback. If you select the checkbox, the subscription will be cancelled on chargeback. |
|
This is how long you want your subscription renewal price list to be valid for renewals from the current date. This attribute allows you to control when you can create a new subscription renewal price list. This attribute prevents you from charging a shopper a different renewal price than the one quoted in their reminder email. See Subscription renewal pricing for more information. When setting the renewal price list limitation, observe the following rules:
Example: If you enter 7 in this field and the current date is March 15th, you will not be able to create a subscription renewal price that is set to start before March 8th. Note that the system uses the start date to determine when a price list becomes active. At a minimum, you should set the value to the least number of days prior to expiration when the system sends the renewal reminder email for your subscription products. Note: For this setting to work with all your subscription products, use the same day intervals you specified for reminder emails for all your subscription products. |
|
|
THINK Subscription Service |
Select this checkbox if you want to use the THINK subscription service. Note: Select this checkbox only when the Digital River staff directs you to enable this feature. |
|
Subscription Controls |
When enabled, allows Merchandising Manager to customize offer behavior for subscription purchases, including automatic and manual renewals.
|
|
If US customers purchase a product for resale or non-profit organization or government agency purchases the product, the sale is tax exempt. |
|
|
Tax Exemption |
Choose one of the following options:
|
|
Sales to non-US customers are typically tax exempt if they purchase products for resale or the customer is a non-profit organization or government agency. |
|
|
Tax Exemption Non US |
Choose one of the following options:
|
|
Shopper Type |
When enabled, these two shopper types will appear on the Checkout (Billing, Shipping, or Information) page as radio buttons.
|
|
Use the Top-Selling Products feature to show a list of the best-selling products in your store. See Site settings and Top-Selling Products for more information. |
|
|
Top-Selling Products |
Displays a list of top-selling products for the site or a particular category. Site design changes are required before you can use top-selling products on your store. Choose one of the following options:
|
|
Refresh Frequency |
Select how often you want the system to recalculate and update the list of top-selling products in your store. Your options are as follows:
|
|
Use Data From Last |
Specify the last number of days you want to use to gather data for the top-selling list. The maximum value is 365 days. The recommended value is 180 days. |
|
Excluded Products |
You can exclude products from the Top-Selling Products list. |
|
Remove |
Allows you to remove products from the Exclude Products list. |
|
Add |
Allows you to add products to the Exclude Product list. |
|
ID |
This field shows the |
|
Name |
The product's name. |
Fulfillment tab
| Attribute | Description |
|---|---|
|
Access Point Shipment Methods |
Use this feature to enable Parcel Collection Point Prerequisite: Ensure that you have created an Access Point shipping method before enabling this feature. |
|
Access Point Shipping Methods |
Choose one of the following options:
|
|
When enabled, this feature automatically displays a system-generated message on the product details page that states when fulfiller expects to ship the line item. When you also enable the Custom Shipping/In Stock Timeframe Message, the custom message will override the system-generated message when provided. Note: This feature requires Site Design changes before you can implement this feature. |
|
|
Choose one of the following options:
|
|
|
Use the Backorder Notifications setting to specify how often to send backorder emails to shoppers. The system sends backorder notifications to shoppers when the product they ordered is on backorder (out of stock). The email tells the shopper if the product is back in stock or still on backorder. |
|
|
Email Frequency |
Select how often you want the system to send notifications to a shopper who has ordered a product that is out of stock and on backorder. |
|
Gift Messaging settings are used to specify if purchasers and recipients can receive a message with their gift orders. This option becomes available once gifting is enabled for products, allowing the option to be selected during the creation or editing of a product to enable gifting for it. If the gift option is chosen for a product, shoppers have the ability to buy the product as a gift and include a special message with it. When a shopper enters a gift message, the message appears on the gift invoice sent with the physical product or in the email notification sent to the gift recipient for digital products. For physical products, your fulfiller must be able to receive and process gift messages so they appear on the invoices. This means they should be aware of the gift message and include it in the package. If you have any questions about this aspect of gift products, contact your Store Operations team. Depending on the notification, when a shopper purchases a gift product, the system sends the appropriate notification emails to either the purchaser or the gift recipient. |
|
|
Digital Gifting is a feature that enables shoppers to purchase digital products as gifts. When this feature is enabled, customers can add personalized gift messages and receipts to their digital gifts. Conversely, disabling Digital Gifting removes the option for customers to buy digital products as gifts, and they won't be able to include gift messages or receipts. |
|
|
Physical Gifting is a feature that enables shoppers to purchase physical products as gifts. Customers can add personalized gift messages, receipts, and special packaging to their physical gifts when enabled. Conversely, disabling Physical Gifting removes the option for customers to buy physical products as gifts, and they won't be able to include gift messages, receipts, or special packaging. |
|
|
The prepaid landed costs |
|
|
Landed Cost |
Choose one of the following options:
|
|
Notify Me |
Use the Notify Me settings to indicate if you want to provide a link (on the Product Detail page) for out of stock products. This allows shoppers to request notification (via email) when an out of stock product comes back in stock. Note: This feature requires Site Design changes before you can implement this feature. The field shoppers use to sign up for stock status appears when you complete the Site Design changes and enable the feature. |
|
Stock Alerts |
When enabled, allows the shopper to request notification when a product comes back in stock.
|
|
Keep Email Addresses |
Select the maximum number of days when a shopper can receive notification that a product is back in stock after a shopper requests notification. When the notification request expires, the system deletes the shopper's request and their email address. |
|
Use the Real-time Stock settings to enable real-time inventory checks for products in your store. When you enable this feature, the stock status of products (in stock, out of stock) will appear on the Product Detail pages in your store. |
|
|
Real-time Stock |
When enabled, allows real-time inventory checks for products in your store. Choose one of the following options:
|
|
Display Shipping Method and Cost |
When enabled, shows an estimate of shipping costs for different shipping methods on the Product Details page in your store. Choose one of the following options:
|
|
External Call |
When enabled, allows your store to use an external call to get stock status. Use this option when a third-party system maintains inventory counts for your products.
|
|
Stock Availability Service |
When enabled, allows your store to use an external call to get stock status.
|
|
The system sends FTC reports on a nightly basis to the email address listed below if the system sends an FTC notification to a customer. If the system sends no FTC notifications, you will not receive a report. |
|
|
FTC Reports |
When enabled, the system sends FTC reports when the customer receives an FTC notification. Your options are as follows:
|
|
Enter Email Address |
Enter the email address for the user or group that will receive the FTC report. |
|
Use this feature to define how a customer can ship their order. |
|
|
Shipping Methods |
Choose one of the following options:
|
Payment Methods tab
Use the Payment Method tab to set up the supported payment methods for your site.
Note: The Payment Methods tab only shows your site’s supported payment methods.
| Attribute | Description |
|---|---|
| Supported Locales |
Use the Supported Locales option to limit the use of a payment method to specific locales only or apply the payment method to all supported locales.
|
| Product Category Default |
Choose the default product category for the credit card payment method. Your options are based on the following payment methods:
|
|
Multiple Terms Display Settings |
This setting lets you configure the terms when a shopper chooses a payment method with terms. Depending on the shopper's preference or the specific requirements of the application, The checkout will show the terms in one of two ways:
The eFinancing LOC payment method uses this feature. |
|
Payment Expiration |
Use the Payment Expiration option to specify whether you want to use Digital River default expiration date or define your expiration date for that particular method. The expiration date determines how long a shopper can still submit the payment after a shopper submits an order. Only use this option for delayed and Client Credit payment methods.
Note: You cannot configure some payment methods at the site level. |
|
Save Payment Method |
This option lets shoppers save their payment method for future transactions, simplifying checkout. When you select the Allow payment method as saved payment method checkbox, the shoppers can securely save and store their payment details for future use, allowing faster and more convenient purchases. Direct Debit uses this feature. |
|
Bank Statement Configuration |
Bank Statement Configuration refers to the specific setup or customization options available for bank statements in a financial system or software. This setup can include various parameters and descriptions that dictate how transactions are categorized, displayed, and reported in the bank statements provided to the account holders. For example, it might involve specifying how different types of transactions, like taxes or shipping fees, are described on the statements for clarity and accounting purposes. This configuration is important for ensuring that bank statements are useful, accurate, and tailored to meet the regulatory requirements and the needs of the users, specifically within the context of the United States (US), if you configure the payment method with a focus on US banking practices and regulations.
The eFinancing Loan and LOC payment methods use this feature. |
|
Client Credit Plus |
Client Credit Plus is a flexible financial option offered to shoppers.
This program offers financial flexibility by providing a tailored credit solution that matches the client's financial needs.
This functionality is designed to provide flexibility in collecting information from applicants, ensuring that you gather all necessary data for a thorough review while streamlining the application process for the client. Line of Credit uses this feature. |
|
Minimum Order Amount |
The Minimum Order Amount feature allows you to set a minimum purchase amount for orders. This can be a critical setting for ensuring the profitability of each transaction. You can enable or disable this feature based on your business needs.
|
|
Post Manual Adjustments |
This feature allows you to manually post credits and debits to each Client Credit Plus account, enabling you to adjust the account balance as needed and rectify discrepancies, process adjustments not covered by automated systems, or accommodate exceptional financial transactions.
|
|
Display Preferences |
Customize your payment page on PayPal to better align with your brand's aesthetics. You have the option to personalize two key aspects:
PayPal Express Checkout uses this feature. |
Preorders tab
Use the Preorders setting to define when you want to process payment authorization for preorders.
| Attribute | Description |
|---|---|
|
Preorder Authorization |
Choose when authorization occurs. Your options are as follows:
|
Security tab
| Attribute | Description |
|---|---|
|
Use the Authorized Browsing Locales setting to indicate which supported locales a shopper (in a specific country) can see when they visit your site. Example: If your European site has four locales, you can specify whether a shopper from one of those locales can browse your store in the other three locales. (Note that your automatic geolocation settings can determine the locales a shopper can visit.) Authorized browsing locales essentially limit a shopper's ability to see your store in one of the other locales supported in your store. You can set up authorized browsing locales to limit the locales (and therefore the products and pricing) a shopper can see based on the shopper's location. This ensures that a shopper can only purchase products from their designated locale. |
|
|
The Authorized Shopping Countries setting allows you to define which shoppers can purchase products in your store based on the billing or shipping address they enter during checkout. Use this feature when you want to:
Note: The search results for authorized shopping countries only display countries supported by Digital River. It does not display embargoed or unsupported countries. |
|
|
Allow Billing From |
Choose the option you want to use to define purchase restrictions based on the shopper's billing address. Your options are as follows:
|
|
Allowed Countries |
Lists the countries that a shopper cannot use when entering their billing information. |
|
Denied Countries |
Lists the countries that a shopper cannot use when entering their billing information. Some countries appear in the Denied Countries list by default. You cannot do business with these countries based on export control restrictions. |
|
Locales |
Supported locales (all other locales besides the default locale) will inherit the settings from the default locale by default. If you want to configure a supported locale differently from the default, click that locale tab, select the Customize for This Locale option, and then add the countries that you want to allow or deny for that locale. |
|
Allow Shipping To |
Choose the option you want to use to define purchase restrictions based on the shopper's shipping address. Your options are as follows:
|
|
Allowed Countries |
List the countries that a shopper can use when entering their billing information. Some countries appear in the Allowed Countries list by default. Supported locales (all other locales besides the default locale) inherit the settings from the default locale by default. If you want to configure a supported locale differently from the default, click that locale tab, select the Customize for This Locale option, and then add the countries that you want to allow for that locale. |
|
Search |
To search for countries you want to deny or allow by locale, click the Search button, select the countries you want to allow or deny, and click Apply. The Selected countries appear in the list. |
|
Comments |
Explain why you defined the restrictions. Provide enough detail to ensure someone else can determine why you denied or allowed billing or shipping to a specific country for a specific locale. |
|
The automatic geolocation setting allows you to send shoppers to a specific site and locale based on their language and geographic location. The feature also allows you to restrict shoppers from certain locations from viewing or shopping in your store. See How Automatic Geo-Location works for more information. |
|
|
Unrecognized Country |
If the country code is not recognized or configured in the Country/Language list, the system redirects the shopper according to your specified settings. Your options are as follows:
|
|
Site |
Choose the site you want to redirect shoppers to from this list. This field appears when you select the Go to specific site option. |
|
Locale |
Choose the locale you want to use from this list. This field appears when you select the Go to specific site option. |
|
Redirect Settings |
Choose whether you want to redirect shoppers visiting your store from an unrecognized country to a specific site or locale based on their location and browser language setting. Your options are as follows:
|
|
Remove |
Remove one or more destinations. |
|
Add |
Add a destination based on the specific country and locale. |
|
Country |
Select a country from the list. |
|
Browser Language |
Select a language. |
|
Destination |
Select a locale for the site. |
|
Country/Language |
Shows the country and language. |
|
Locale |
The name of the locale. |
|
When enabled, this feature protects shoppers against attacks that force them to unwittingly perform actions against their permission. |
|
|
Cross-Site Request Forgery Prevention |
Choose one of the following options:
|
|
Enable CSRF for Anonymous Users |
Choose one of the following options to enable Cross-Site Request Forgery Prevention (CSRF) for anonymous users:
This toggle appears when you select ON for Cross-Site Request Forgery Prevention. |
|
Define the shopper's password strength. |
|
|
Minimum Password Length |
Define the minimum number of characters that a shopper must use for a password. The minimum number of characters is 8. The maximum number of characters is 32. |
|
Enhanced Password Strength |
Enhanced password strength requires a secure shopper's password. In addition to meeting the minimum password length, the password will need to include three of the following characteristics:
Choose one of the following options:
|
|
Allows you to use a Secure Session Cookie to prevent Global Commerce session hijacking. |
|
|
Secure Session Cookie |
Choose one of the following options:
|
|
Lenient Mode |
If the secure cookie sent by the client does not match with the information originally sent to the client, the system will log out the session automatically (including the innocent client) when you disable Lenient Mode.
The Lenient Mode appears when you select the Enabled option Secure Session Cookie. |
|
Define how shoppers can regain access to their account if they forgot their password. Some settings may require assistance from your Store Operations Manager. |
|
|
Forgot Password Email |
Choose how you want to respond when a shopper requests a new password because they forgot their password:
|
|
Enter the number of hours before the link expires. The value must be greater than zero (0). This field appears when you select the Send Shopper a Link to Reset Their Password option. |
|
|
Define your policy for protecting shopper accounts from an automated hacking attack. |
|
|
Account Protection |
Choose one of the following options:
|
|
Number of Attempts |
Enter the number of failed login attempts that trigger account protection. The number must be greater than 0 and less than 16. |
|
When enabled, shoppers must enter their current password when they change their password. |
|
|
Shopper Current Password Check Settings |
Choose whether a shopper must enter their current password when they change their password.
|
How to determine the template used by the site
Required Role: Content Manager![]() This Global Commerce user role allows users to manage themes and styles, use Store Builder files, manage history for storefront links, view compare pages, view the Configure Site Settings page, and preview their store. or Internal User
This Global Commerce user role allows users to manage themes and styles, use Store Builder files, manage history for storefront links, view compare pages, view the Configure Site Settings page, and preview their store. or Internal User![]() An internal Digital River user of Global Commerce. Internal users have access to features or settings that clients do not. These features
or settings could really affect commerce on the store or is complicated
to set up or manage.
An internal Digital River user of Global Commerce. Internal users have access to features or settings that clients do not. These features
or settings could really affect commerce on the store or is complicated
to set up or manage.
- Select Administration, select Site, and then click Configure Site Settings. The Configure Site Settings page appears.
-
Look at the heading at the top of the page. The template used by your currently selected site appears in parenthesis.

How to enable estimates
Required Role: Content Manager![]() This Global Commerce user role allows users to manage themes and styles, use Store Builder files, manage history for storefront links, view compare pages, view the Configure Site Settings page, and preview their store. or Internal User
This Global Commerce user role allows users to manage themes and styles, use Store Builder files, manage history for storefront links, view compare pages, view the Configure Site Settings page, and preview their store. or Internal User![]() An internal Digital River user of Global Commerce. Internal users have access to features or settings that clients do not. These features
or settings could really affect commerce on the store or is complicated
to set up or manage.
An internal Digital River user of Global Commerce. Internal users have access to features or settings that clients do not. These features
or settings could really affect commerce on the store or is complicated
to set up or manage.
- Select Administration, select Site, and then click Configure Site Settings. The Configure Site Settings page appears.
- Click the Checkout tab. See Checkout tab for a description of the options.
- Under Request Estimate, select Enabled.
- Choose Single or Unlimited for the Order Limit.
- Specify when you want the estimate to expire for the Set Estimate Expiration option.
-
Choose whether you want the system to send a reminder to the shopper after they create their estimate for the Send Reminder Email option. The system sends only one reminder.
Best Practices: Choose Remind recipient and specify how many days after the creation date when the system should send the reminder. Reminders may help increase sales for estimates.
- Choose whether you want a Contact Me checkbox to appear for the Display "Contact me... Checkbox. If you choose Yes, provide the email address for the company representative in the Company Representative field.
- Click Save.
How to configure Event Notifications settings
The following task shows you how to enable post-order notifications (PON) for a return, refund, or payment event.
-
Select Administration, select Site, and then click Configure Site Settings. The Configure Site Settings page appears.

-
Click the Event Notifications tab. The Return tab on the Event Notifications tab appears.

-
For each tab (Returns, Refunds, Line Item Level, Order Level, Payment, or Other) under the Event Notifications tab, select one or more event notification checkboxes or Select All to select all event notification checkboxes.
- Click Save. Global Commerce immediately applies the changes to your store and sends notifications to your designated endpoint.
How to enable the cancellation/return of a product combination
At the site level, you can determine how Global Commerce handles the cancellation or return of all components in a product combination together. When you enable the Cancel/Return Product Combination feature in Global Commerce, it will handle the cancellation of all unfulfilled components and the return of all fulfilled components of the product combination together.
Prerequisite: You must enable product combinations before you create a product with components.
To enable the cancellation/return of a product combination together:
Required Role: Content Manager![]() This Global Commerce user role allows users to manage themes and styles, use Store Builder files, manage history for storefront links, view compare pages, view the Configure Site Settings page, and preview their store. or Internal User
This Global Commerce user role allows users to manage themes and styles, use Store Builder files, manage history for storefront links, view compare pages, view the Configure Site Settings page, and preview their store. or Internal User![]() An internal Digital River user of Global Commerce. Internal users have access to features or settings that clients do not. These features
or settings could really affect commerce on the store or is complicated
to set up or manage.
An internal Digital River user of Global Commerce. Internal users have access to features or settings that clients do not. These features
or settings could really affect commerce on the store or is complicated
to set up or manage.
-
Select Administration, select Site, and then click Configure Site Settings. The Configure Site Settings page appears.
-
Click the Features tab, scroll to Cancel/Return Product Combination, and select Enabled or Disabled. For a description of the fields, see Cancel/Return Product Combination.
-
Click Save.
The everything-or-nothing rule
When you enable the Cancel/Return Product Combination feature in Global Commerce, it tightly combines all the components within the product combination. So when a shopper orders the product combination, the components are shipped and fulfilled by line item. However, if they initiate a cancellation or return of the product combination, the entire product combination will be cancelled or returned. It is the everything-or-nothing rule. The exception to the everything-or-nothing rule is you don't need to cancel a trial product while handling product combination cancellation.
How to enable a customized subscription renewal price for a product combination
When you select Component Price, the subscription renewal price will continue to use the product combination's configured component price. When you choose the List Price, the subscription renewal price will use the products' price in the price list.
-
Select Administration, select Site, and then click Configure Site Settings. The Configure Site Settings page appears.
-
Click the Features tab. See Subscription Renewal Pricefor more information.
-
Scroll down to the Renewal Price under Subscription Product Combination, and click List Price.

-
Click Save.
How to configure site settings for subscription products
Required Role: Content Manager![]() This Global Commerce user role allows users to manage themes and styles, use Store Builder files, manage history for storefront links, view compare pages, view the Configure Site Settings page, and preview their store. or Internal User
This Global Commerce user role allows users to manage themes and styles, use Store Builder files, manage history for storefront links, view compare pages, view the Configure Site Settings page, and preview their store. or Internal User![]() An internal Digital River user of Global Commerce. Internal users have access to features or settings that clients do not. These features
or settings could really affect commerce on the store or is complicated
to set up or manage.
An internal Digital River user of Global Commerce. Internal users have access to features or settings that clients do not. These features
or settings could really affect commerce on the store or is complicated
to set up or manage.
-
Select Administration, select Site, and then click Configure Site Settings. The Configure Site Settings page appears.
-
Click the Features tab.
-
Scroll down to the Subscriptions pod.
-
Complete the fields and select the appropriate checkboxes. For a description of the fields, see Subscriptions.
-
Click Save.
How to enable Parcel Collection Point (access point) shipping method
Required Role: Account Manager
- Select Administration, select Site, and then click Configure Site Settings.
- Click the Fulfillment tab.
- Under Access Point Shipment Methods, select Enabled.
- Click Apply.
How to configure the Authorized Browsing Locales Settings
- Select Administration, select Site, and then click Configure Site Settings. The Configure Site Settings page appears.
- Click the Security tab.
- Under Authorized Browsing Locales, click the Authorized Browsing Restrictions toggle switch to ON.
- Select the default locale tab. Configure the default locale first, and then configure the other locales if you want to set up your supported locales independently of the default locale. By default, supported locales inherit the settings of the default locale. If you do not want to change the supported locales, you only have to configure the settings for the default locale.
- Click Add Group. The Add Authorized Browsing Group dialog appears.
- Enter a name for the group you want to create in the Group Display Name field. The name should reflect the locales you may add to the group, such as "Europe" or "North America."The name you enter must be unique for the site. You can only use a name once per site.
-
Click Save. The Live Change Warning dialog appears.
-
Type your user name as it appears in the Live Change Warning dialog to verify that you want to make the change on your live store and click OK.
- Select the checkbox next to the group you just created and click Add. The Add Authorized Browsing Link dialog appears.
- For the Type option, select whether you want the system to redirect a shopper who is part of the group to a site/locale that is part of your Digital River store, or whether you want to redirect shoppers to another URL.
- In the Site Display Name field, enter the name for your site that you want to appear to a shopper in this group.
- From the Locale list, select the locale that the shopper can visit if they are part of the group.
-
Click Save. The Live Change Warning dialog appears.
-
Type your user name as it appears in the Live Change Warning dialog to verify that you want to make the change on your live store and click OK.
How to configure the Authorized Shopping Countries settings
- Select Administration, select Site, and then click Configure Site Settings. The Configure Site Settings page appears.
- Click the Security tab.
- Choose the Allow Billing From option you want to use to define purchase restrictions based on the shopper's billing address. See Authorized Shopping Countries for a description of the fields.
-
Depending on the option you selected in the previous step, you can add allowed countries to your store's supported locales. Supported locales (all other locales besides the default locale) will inherit the settings from the default locale by default.
To configure a supported locale differently from the default locale:
- Select the locale tab that you want to modify.
- Select the Customize for This Locale option.
- Click Search
 and type the name of the country in the Search field.
 - Click one or more countries in the Search Results list to move them to the Selected Items list and then click Apply. The countries appear in the Allowed Countries list for the selected locale.
- Choose the Allow Shipping To option you want to use to define purchase restrictions based on the shopper's shipping address. See Authorized Shopping Countries for a description of the fields.
-
Depending on the option you selected in the previous step, you can add the countries you can add denied countries to your store's supported locales. Supported locales (all other locales besides the default locale) will inherit the settings from the default locale by default.
To configure a supported locale differently from the default locale:
- Select the locale tab that you want to modify.
- Select the Customize for This Locale option.
- Click Search and type the name of the country in the Search field.
- Click one or more countries in the Search Results list to move them to the Selected Items list and then click Apply. The countries appear in the Denied Countries list for the selected locale.
- Explain why you defined the restrictions in the Comments field. Provide enough detail to ensure someone else can determine why you denied or allowed billing or shipping to a specific country for a specific locale.
How to configure the Automatic Geolocation settings
- Select Administration, select Site, and then click Configure Site Settings. The Configure Site Settings page appears.
- Click the Security tab.
- Under Automatic Geo-location, select the Unrecognized Country option you want to use when a shopper in from an unrecognized location visits your store. See Automatic Geo-Location for a description of the fields.
- Select the Redirect Settings option you want to use to redirect shoppers.
-
To add a geolocation, click Add, complete the fields in Add Geo-Location dialog, and then click Save. The Live Change Warning dialog appears.
-
Type your user name as it appears in the Live Change Warning dialog to verify that you want to make the change on your live store and click OK.
How to configure the Payment Methods settings
- Select Administration, select Site and then click Configure Site Settings. The Configure Site Settings page appears.
- Click the Payment Methods tab.
- Choose one of the following options for Supported Locales:
- Allow all payment methods on all supported locales—Select this option if you want to use all payment methods for all supported locales.
- Restrict to selected locales—Select this option if you want to limit the use of a payment method to specific locales only. Each payment method will only appear in the selected locales.
- Expand the payment method you want to configure the attributes associated with the payment method. See Payment Methods tab for a description of the fields. Repeat this step for each additional payment method.
- Click Done when finished.