How to create a subscription plan
Use the Create Subscription Plan page to create a subscription plan. The Create Subscription Plan wizard guides you through each step of the creation process.
-
To access the Create Subscription Plan wizard, Choose one of the following options:
- Select Catalog, select Subscription Plans, and then click Create Subscription Plan.
- Select Catalog, select Subscription Plans, click Manage Subscription Plans, and then click Create Subscription Plan.
The Subscription Plans page appears.
-
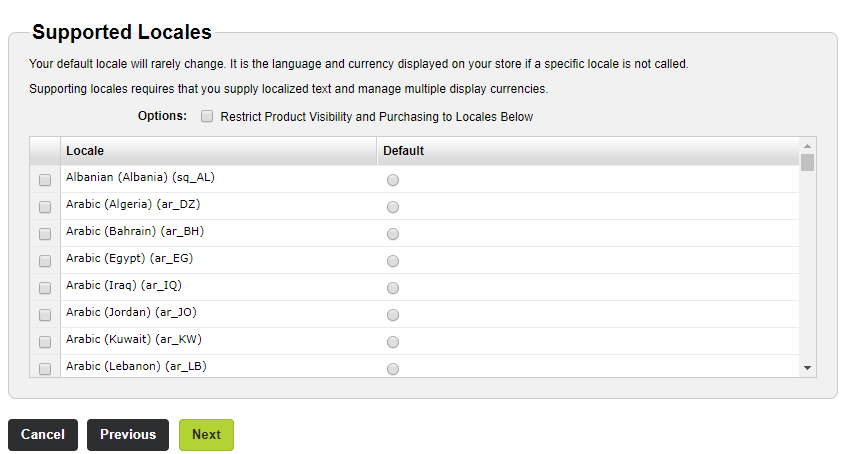
Select the supported locales.
-
Select the checkbox next to each locale you plan to support.

-
Select the Default option next to a locale that you want to use as the default.
The system will use the default locale to display in your store if the shopper’s locale is unknown.
-
If required, select the Restrict Product Visibility and Purchasing to Locales Below checkbox. This checkbox allows you to sell this product only to the selected locales.
- Click Next.
-
-
Add the plan to catalogs and categories.
- Under Add Plan to Catalogs, select the checkbox next to each catalog where you want the subscription plan to appear.
-
Under Add Plan to Categories, select the checkbox next to each category where you want your plan to appear.
Note: You must select a catalog before you can select a category.
- Click Next.
-
Add options for the plan.
-
If your company created Custom attribute families, select the checkbox next to each option you want to apply to the plan.
Note: You must select the Subscription option.
- Click Next.
-
-
Add the terms for the plan.
- To add a term, click Add, complete the fields, and then click Save.
- Click Next.
-
Configure the plan settings.
- To change the plan settings for the default locale, click the default locale tab and complete the fields. If you click a different locale tab, click Yes when prompted to save your changes.
- Click the tab for a locale, select the Override default local settings checkbox, and complete the fields. If you click a different locale tab, click Yes when prompted to save your changes.
- Repeat step b for each additional locale.
- Click Next.
-
Configure the plan's features.
- To change the plan's features for the default locale, click the default locale tab, complete the fields, and add new features (products). If you click a different locale tab, click Yes when prompted to save your changes.
- Click the tab for a locale, select the Override default local settings checkbox, complete the fields, and add new features (products). If you click a different locale tab, click Yes when prompted to save your changes.
- Repeat step b for each additional locale.
- Click Next.
-
Configure the feature settings.
- Select the options you want to use.
- Click Next.
-
Define the pricing for the plan.
- Complete the fields.
- Click Next.
-
Define the billing options for the plan.
- Complete the fields.
- Click Next.
-
Define when you want to send email notifications.
- Select the email notification options you want to use.
- Click Next.
The Plan Summary page appears.
-
Click Save.
Important: By clicking "Save" and adding a plan through this interface, you acknowledge the Export Compliance Acknowledgment Statement. This statement appears at the bottom of the Plan Summary step.